Docker Registry settings
如何連到 Container Registry 並且使用它。
Azure Container Registry
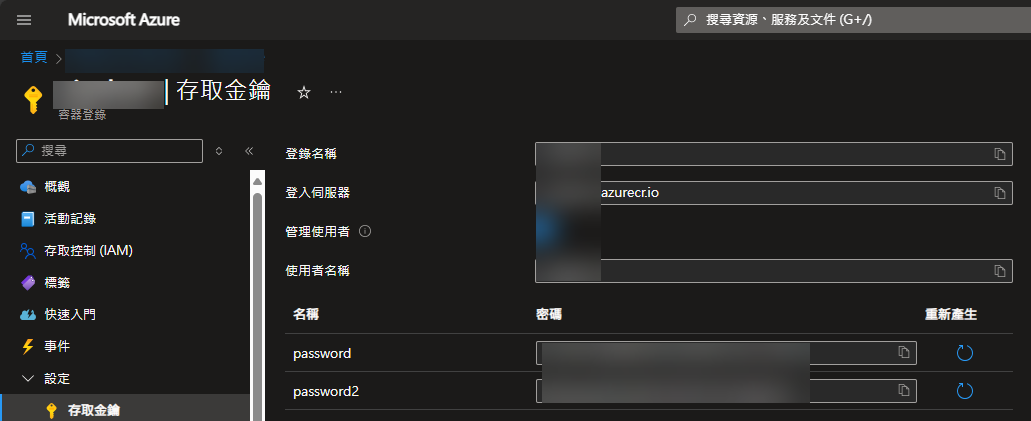
從 ACR 設定中的存取金鑰取得登入伺服器、 username 和 password。
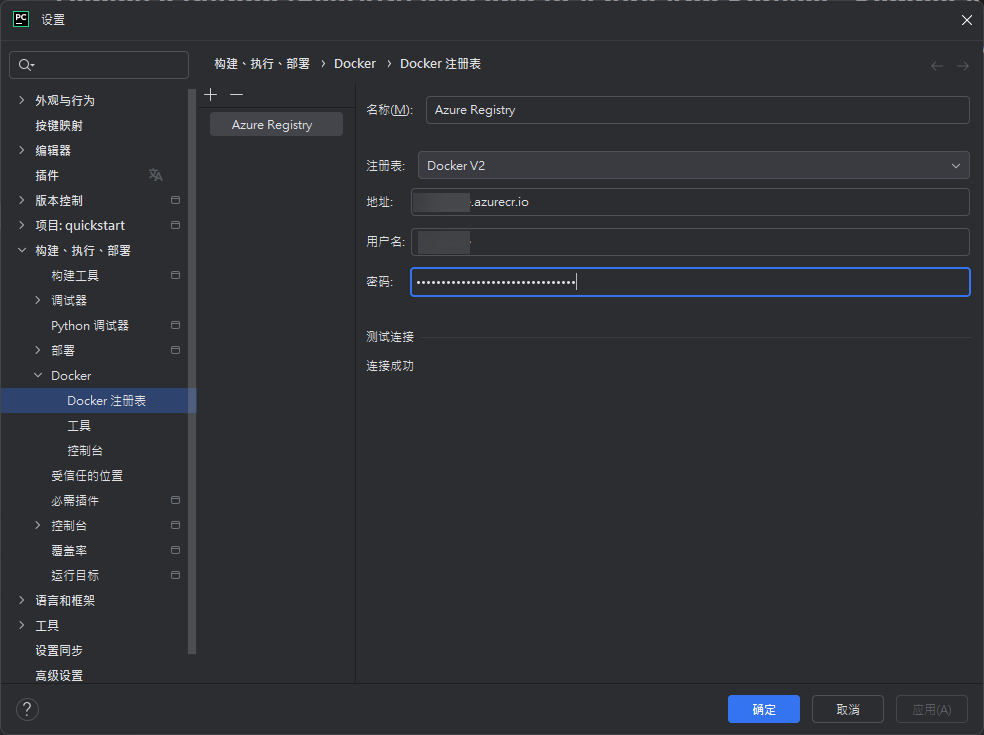
打開設定中的 Docker 註冊表,選擇Docker V2 ,並輸入登入伺服器、 username 和 password。
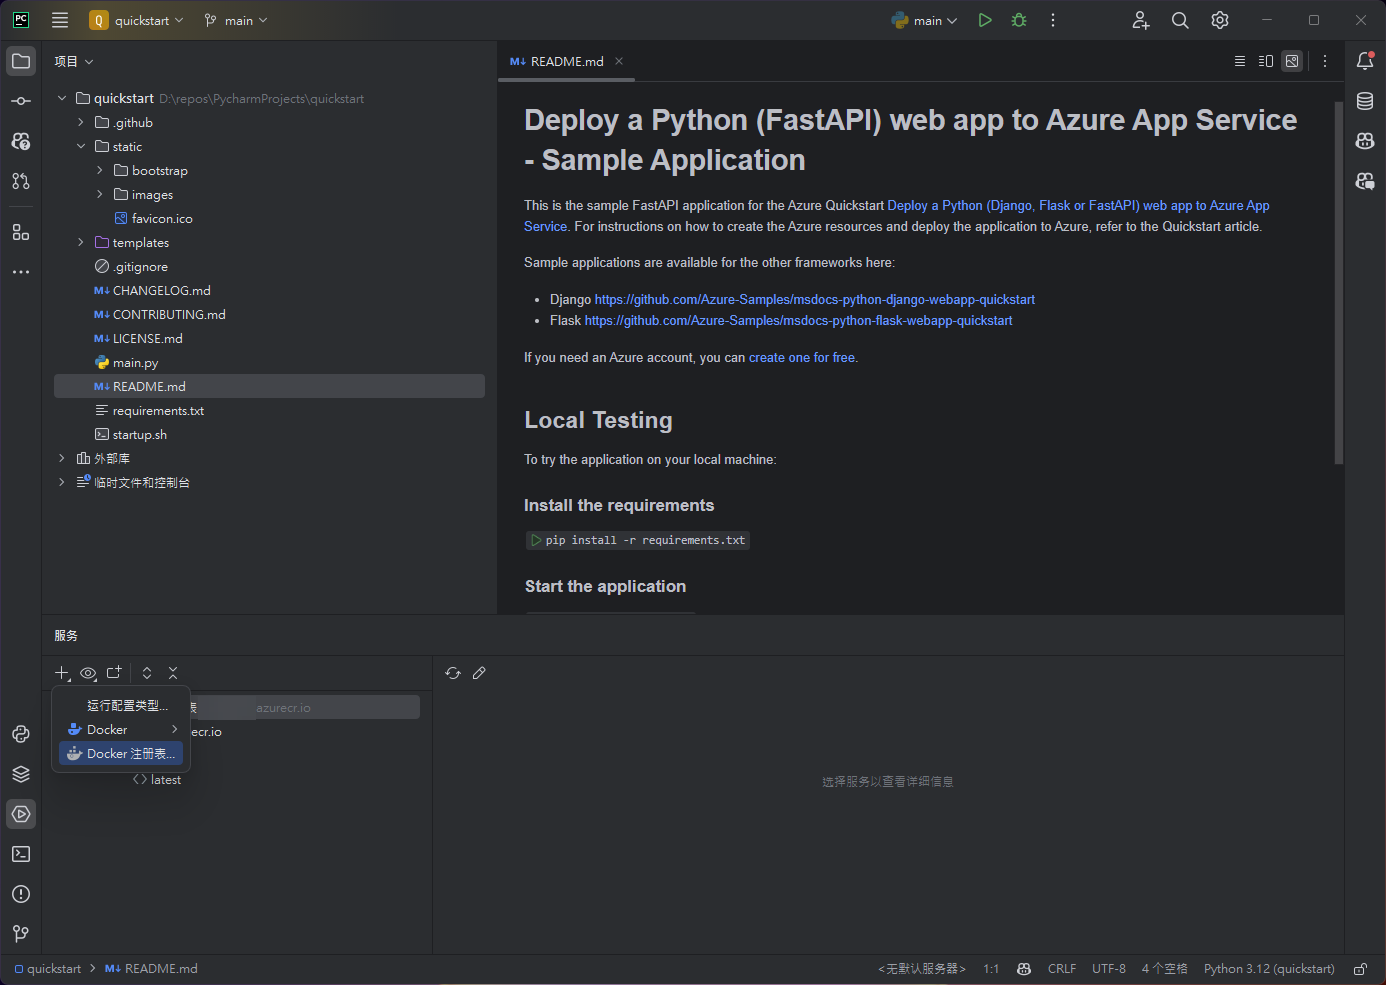
也能從服務裡面新建設定
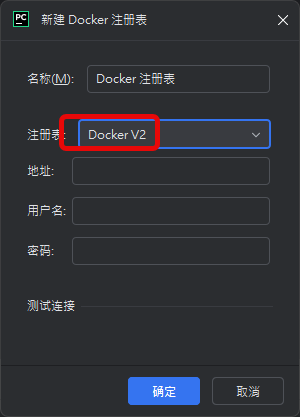
選擇Docker V2 ,並輸入 Azure Container Registry 的登入伺服器和帳號密碼
推送
右鍵點擊 Dockerfile

運行或直接修改運行配置,鏡像標記中輸入一下名稱,方便以後識別,不然會是 sha256 (簡稱亂碼)
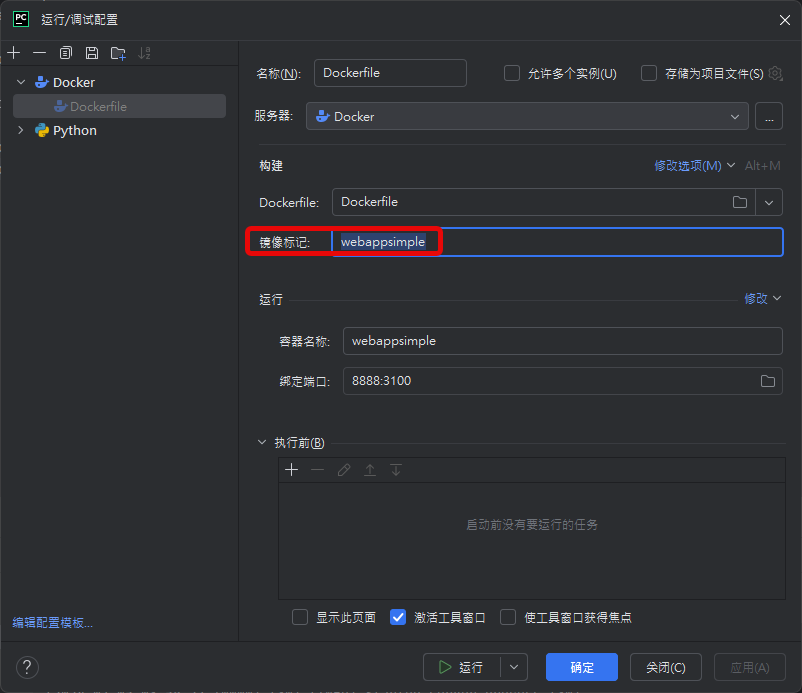
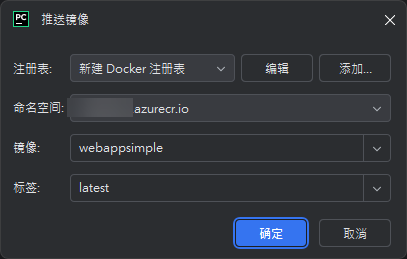
運行後到服務 Docker 鏡像中會有剛剛的鏡像名稱的 image,右鍵可以推送鏡像

選擇 ACR
到 Azure Web App for Containers 裡面可以看到剛剛推送的鏡像
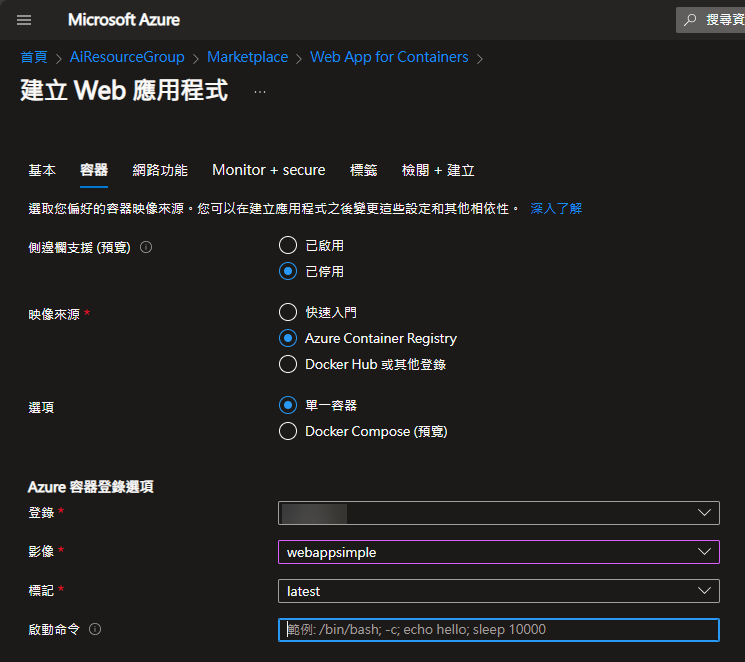
啟動命令
Python 主程式位於 src/main.py,所以啟動命令為
gunicorn main:app --chdir src
請依自身情況修改
CI/CD
預設是關閉的,打開後可以設定 CI/CD
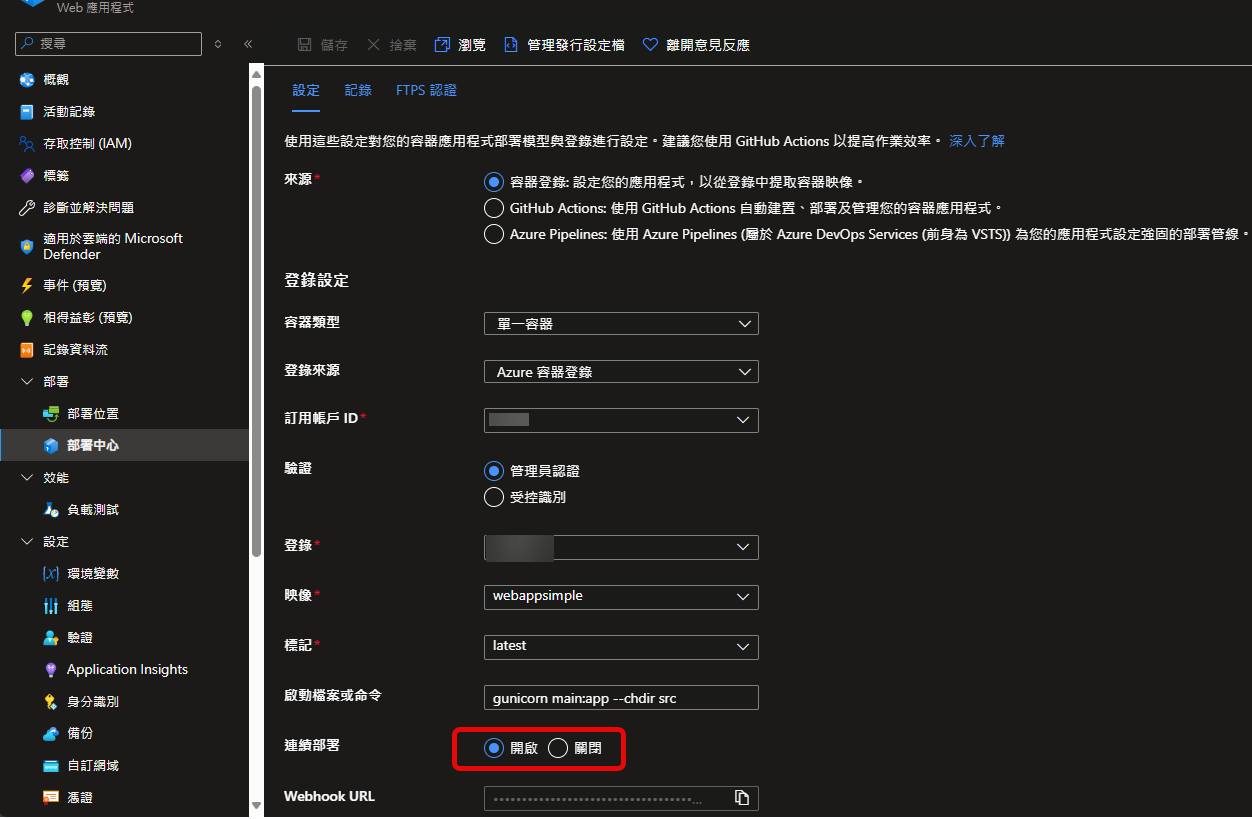
設定時上方會有紅色警告,需要開啟基本驗證
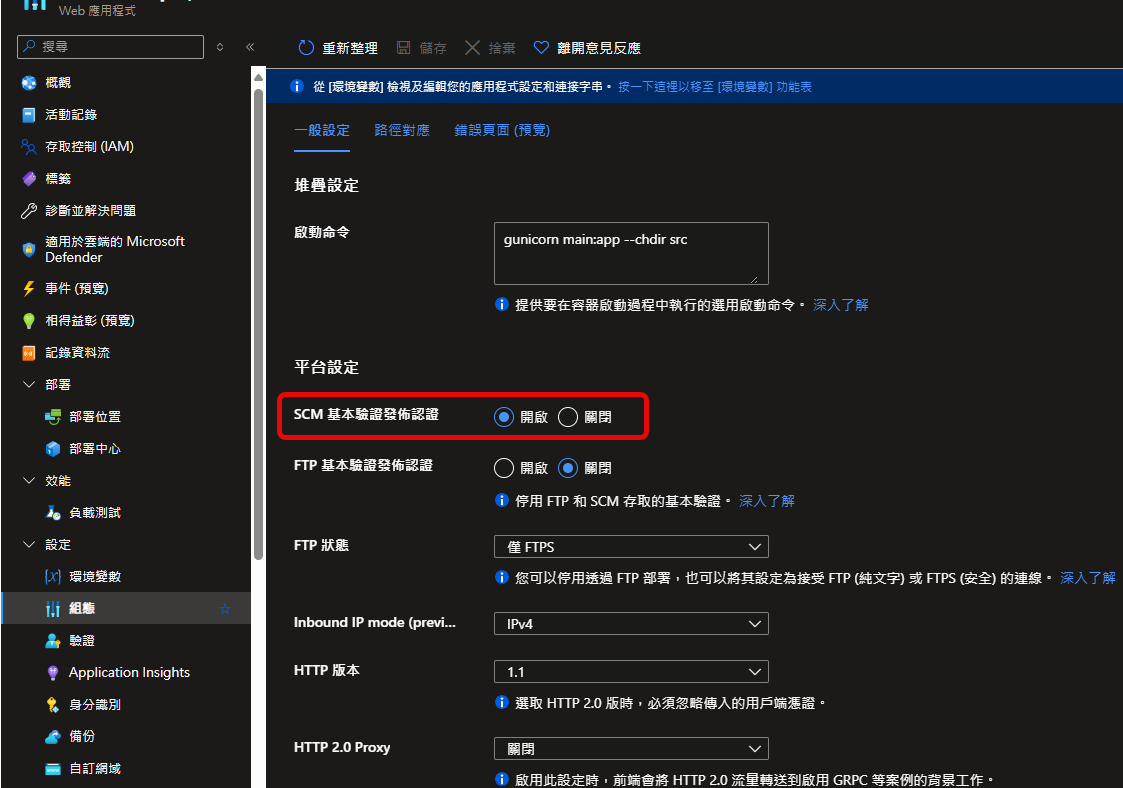
設定好後再回到 部屬中心最下方 Webhook URL 右方點擊複製
回到 ACR 的設定中,選擇 Webhook 設定

於 服務 URI 更新成剛剛複製的 URL
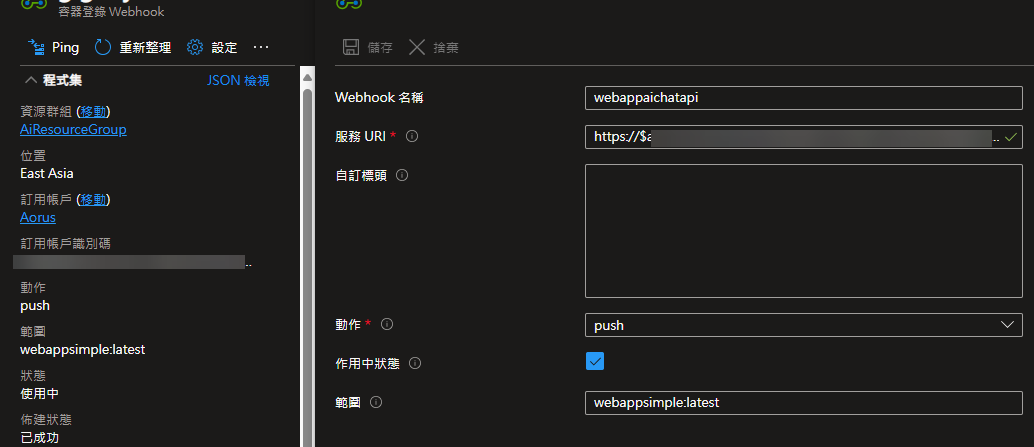
如果沒有就自己新增一個,之後可以點 Ping 來測試是否成功,正常會取得 202

最後 Push 一次鏡像,就會自動部屬到 Web App
說明
服務 URI 是 Webhook URL,當鏡像 Push 到 ACR 後
會觸發一個 Post Request 到這個 URL
通知 Web App 這個鏡像要重新部屬。
錯誤
401 預設沒有啟用基本驗證,Webhook URL 中沒有帶帳號密碼,所以沒有權限可以 POST
404 錯誤的服務 URI,重新到 App Service 中複製一次 Webhook URL